From Slab to Centerpiece: preparing your new countertop
The unique aspects of your project don’t stop with the choice of countertop style. Here are the other ways you can add your creative touch.
While many homeowners love flexing their creative muscles on these details, they can be overwhelming to others. Don’t worry, we’re here to help!
Watch: The Complete Countertop Process
We take you along for a complete countertop project, from start to finish, so you can know exactly what to expect.
Step 1: Layout
The obvious first question is where the countertop will be installed. Will the configuration of your space remain the same or be reimagined? Our team will survey your space and make a computer model of your new countertop, ensuring it is cut to perfection.
Step 2: Material

The most important choice is the obvious one: what countertop material do you want?
Granite is a natural stone surface that offers the most unique colors and patterns that nature can deliver. It is heat and scratch resistant, but needs to be sealed periodically to maintain its finish and prevent staining.
Quartz is an engineered surface that can be made in a wide variety of colors and styles and is very durable, requiring virtually no maintenance.
Quartzite is a natural surface that is harder than granite and quartz, but less flexible and available in fewer colors and styles. Because it is a natural stone like granite, it too requires sealing and regular maintenance to ensure a long life.
Step 3: Colors and Styles
Each kind of surface is available in a variety of styles and patterns. Check out our Central Stock for our more popular styles, or visit our showroom to see them in person! If you have a different color in mind, we can get it for you. Let’s talk!
Step 4: Edges
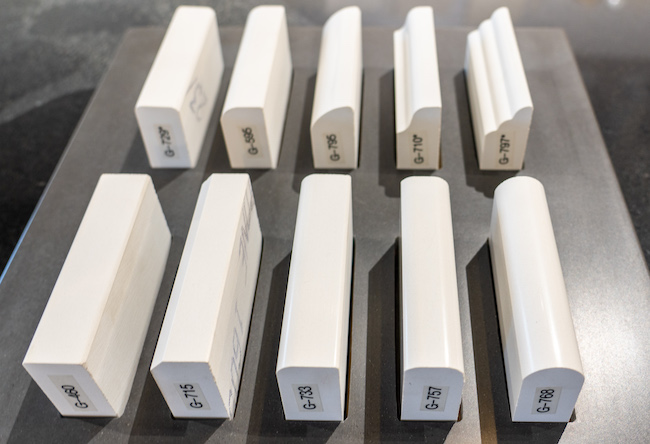
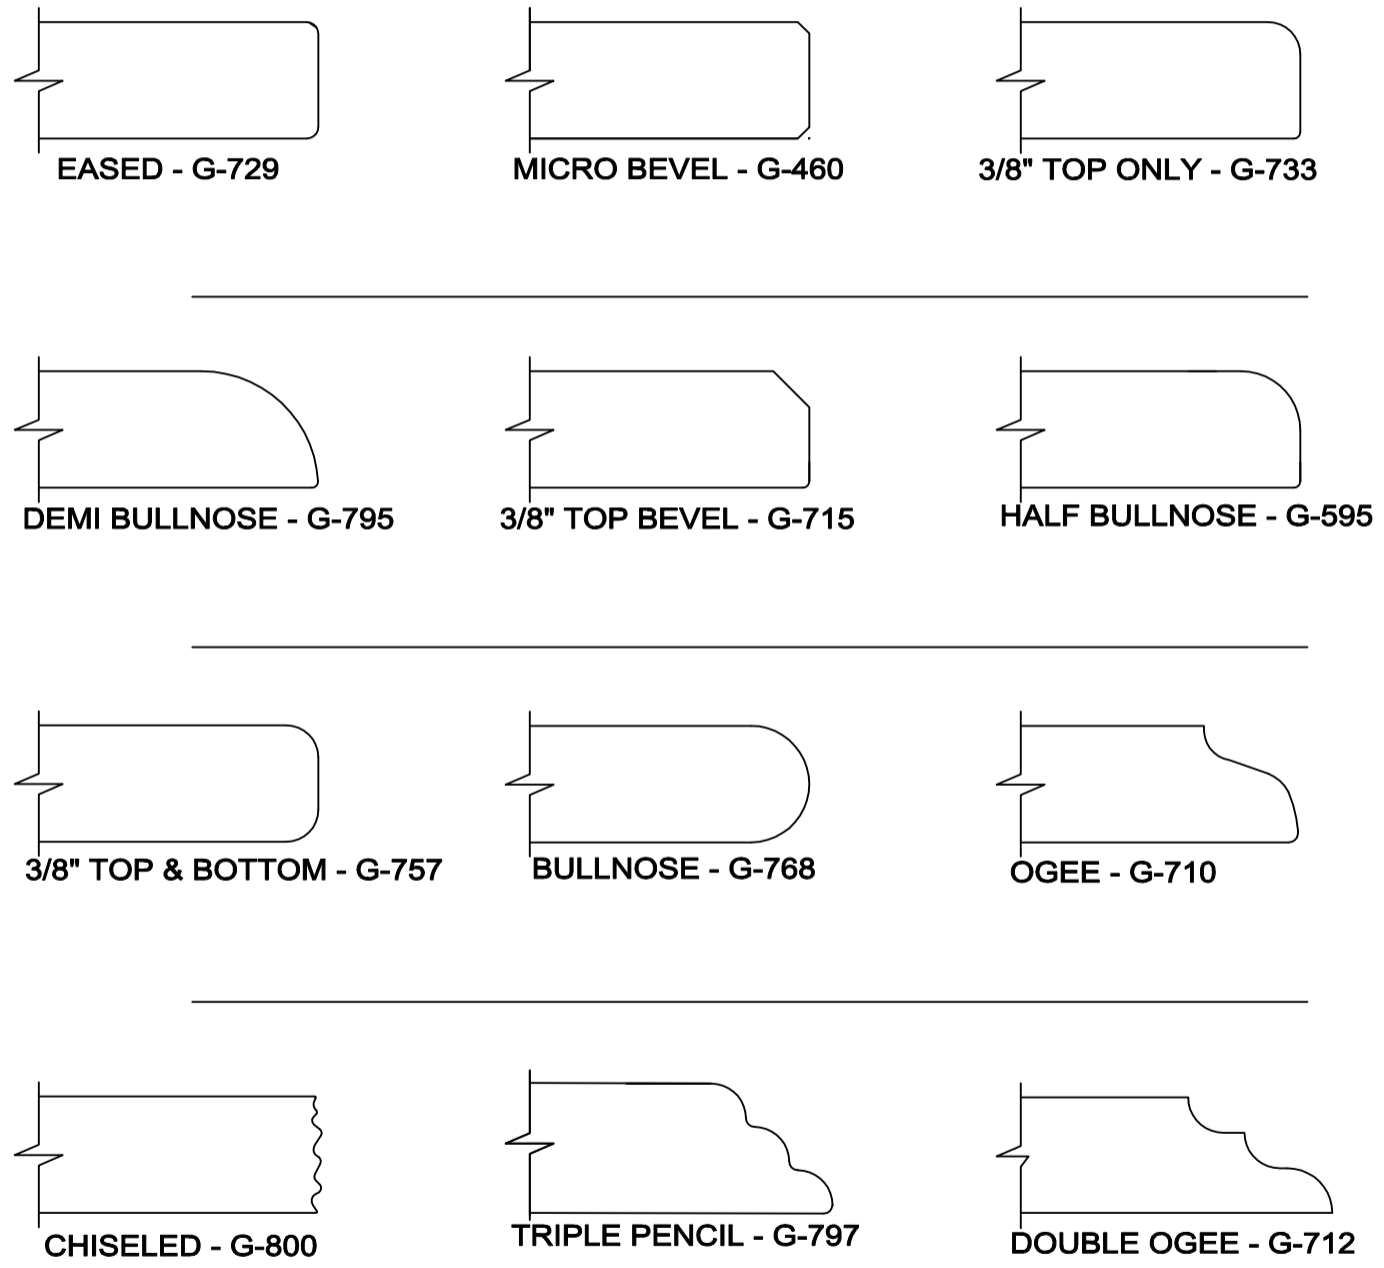
Every surface is processed in our state-of-the-art shop to prepare it for your unique installation. That means you have choices in how it is prepared. These outlines show the different edges that can be applied to any surface. Each one impacts the look and feel of your countertop.
Step 5: Finish
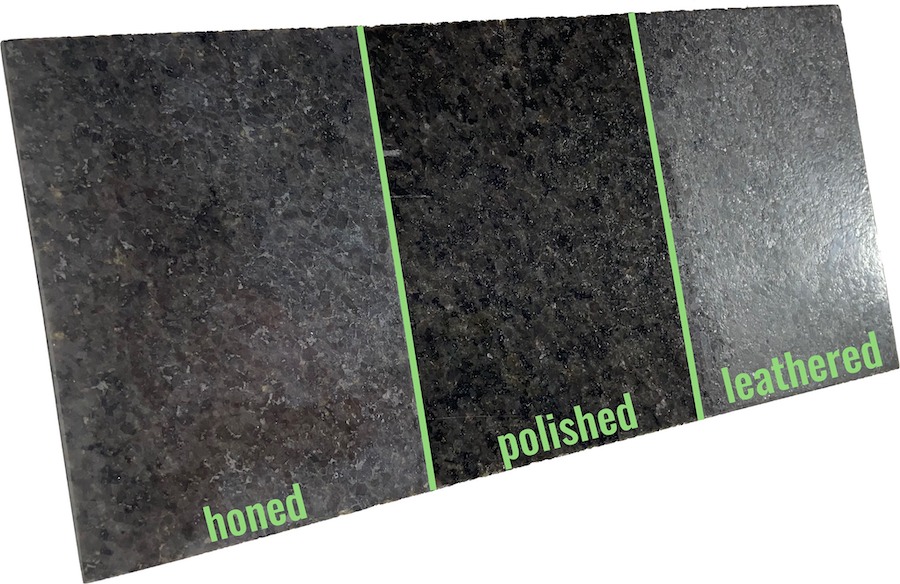
The finish of your surface impacts its look and feel, unlocking yet another layer of design possibility in your project. This photo shows three finishes in the same piece of stone.
A honed surface is flat and smooth with a matte finish.
Polished is the most popular finish, resulting in a smooth, glossy look.
Leathered leaves a textured look and feel with low shine, evoking the feeling of natural stone.
It is difficult to portray the nuances of these looks in photos, so it is best to see for yourself in our showroom!
Step 6: Sinks
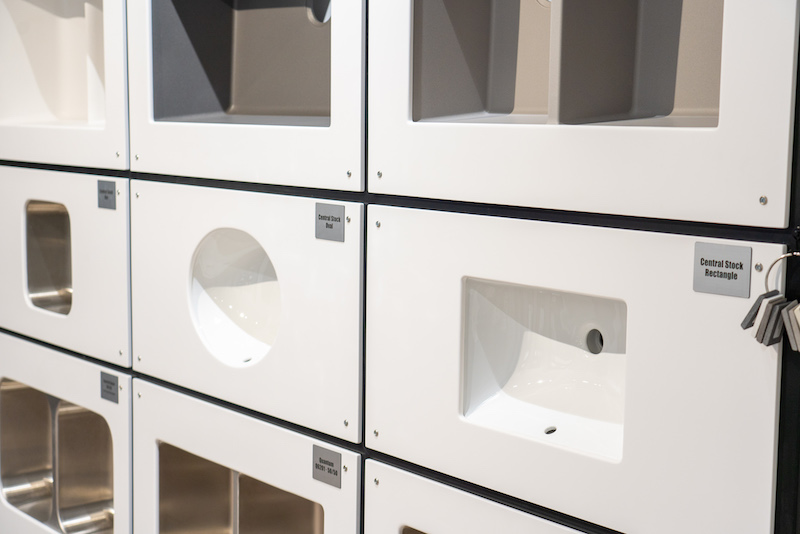
Sinks are available in a variety of configurations and colors and will make a big difference in how you experience your new space. We carry some of the most popular styles in our showroom and can work with any choice you desire!
Step 7: Holes and Cutouts
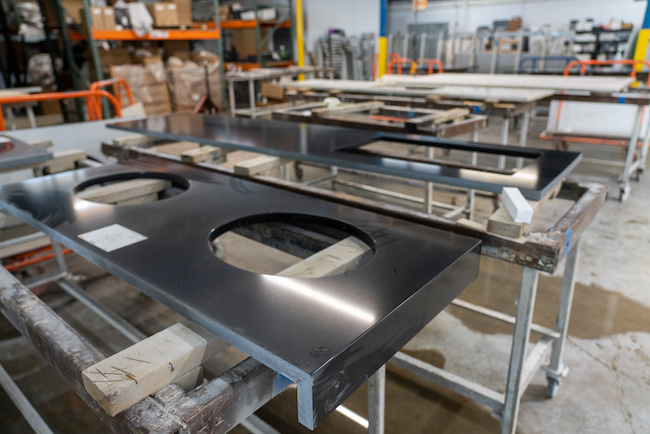
Our process prepares your countertop to exact specifications. The cutouts start with the obvious spots for your sink choice, but that’s just the beginning. Custom cutouts accommodate a variety of uses, including:
- Cooktops
- Garbage disposal controls
- Soap dispensers
- Trash chutes and openings
Step 8: Installation
This is when imagination ends and realization begins! Our professional team completes the installation, and you can start enjoying a countertop that is uniquely yours, featuring all of the creative choices you made throughout the process!
Let’s get started!
Whether you know exactly what you want or just want to start exploring all of the amazing options, we’re here for you. Send us a note, drop in to our showroom or give us a call at 816-200-7250!
